I get really overwhelmed easily. If I feel like I have too much of one thing I start to freak. I get worried that I will never be able to use it all and it will all go to waste.
I also have a problem with forgetting.
Like the whole "Outta Sight Outta Mind" kinda deal.
Yeah, if it's not right in front of my face, I never end up using it.
The same goes for my makeup.
I feel like I have nothing but compact after compact that take up so much space and clutter my bathroom.
I also tend to get stuck using the same products over and over again, so I don't have to sort through hundreds of plastic containers.
Little did I know, many people had this same problem and someone already came up with a solution.
It's called a Z Palette.
Basically, it's a magnetic palette that can store several makeup products at once.
It's a way to save space and also to help you see everything you have.
All you have to do is 'depot' your makeup, and it magnetizes onto the palette.
There are several different sizes available which is nice. I already knew I wanted the largest size, the pro, but I didn't want to fork over the $25 price tag.
ouch.
So, instead, I looked into ebay.
I was so pleased to find that there were factory blemished models on there for only $13.99.
Did I care that there was a scratch on the outside? No.
Did I want to save over half the price of the original? yes!
So, I ordered it.
Actually, I ordered two.
{Click this link to find the ones I'm talking about.}
and when they came in the mail, I was shocked. They literally looked brand new! I honestly didn't see any 'blemishes'! Score!
So, anyway, I began on my 'depotting rampage'.
Thus, the tutorial:
There are several videos online for how to do this, but I think doing it yourself does take some trial and error. I'd be lying if I said that I didn't break any eyeshadow in the process, but now, I've got it down to a tee.
Here is what you'll need:
- Z palette
-makeup of your choice
-exacto knife
-scissors
-some sort of flat hot tool (I used my flat iron, but you could use a regular old iron)
-Magnetic tape
-wax/parchment paper
-Sticky stuff remover/Goo Gone
-paper towel
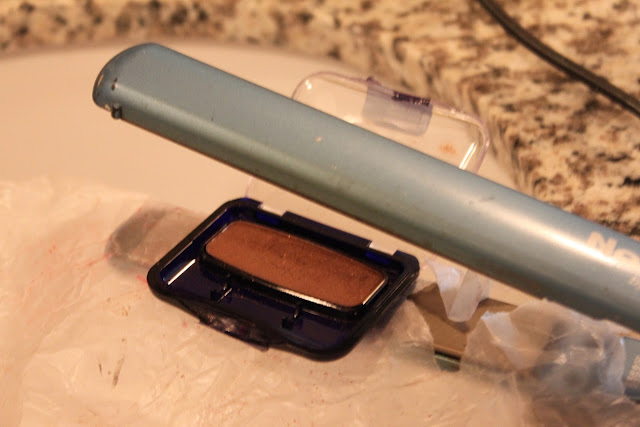
So, the first thing to do is turn on the heat. You're going to want it hot, so I turned my flat iron on to the highest setting. You can also place a piece of the wax/parchment paper on top of it, to prevent the packaging from melting onto your iron.
Next, you'll place the makeup you want depotted onto the iron. You are going to have to play around with how long you leave it on there because it will depend on the packaging itself and the heat from your iron. This particular eyeshadow took me about 45 seconds.
DO NOT LEAVE THE MAKEUP UNATTENDED!!!
It doesn't take long for it to melt completely, and that's a big mess.
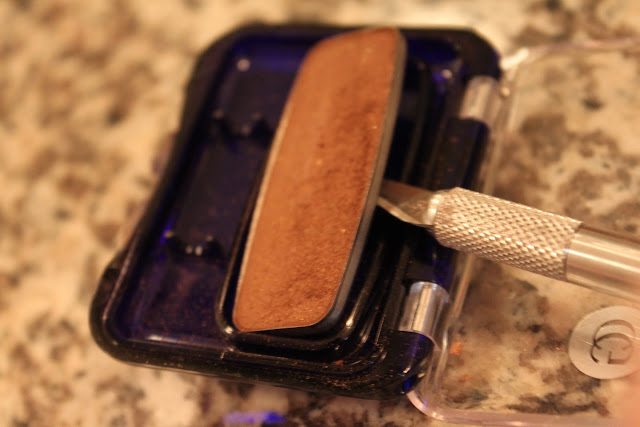
As soon as you take it off the iron, grab your exacto knife and search for a gap in between the makeup pan and the packaging. This will make it easier to pry out and will help you not destroy your makeup in the process.
Once you do, begin prying it out. It should come out fairly easily. If your'e struggling, or starting to see cracks in the makeup, STOP! You need more heat to melt the glue!
If you keep trying to get it out, you will break your makeup, but just place it back on your iron.
This is what you should be left with. You can remove the glue with the sticky-stuff remover.
Then, be sure to write on the back the name of the product, so you don't forget!
After, you can place it in your palette to see if it's magnetic or not.
This one was, (it's covergirl)
but if it's not, then cut a thin strip of the magnetic tape and place it on the back. Then, you should be good to go!
Now, you can fill your palette with anything of your choice!
I did my blushes/bronzers and also all my eye shadow.
It's so nice to be able to see everything, instead of having to search through my drawer to find it.
and the best part is that none of this is permanent! Since it's magnetic, I can move everything around if I don't like how I've placed it.
My biggest suggestion is to try your first go at this on something you wouldn't be upset if it broke.
My first try at this was one of my favorite blushes and I was really sad that it broke when I was trying to depot it. Definitely pick something you don't mind losing to try this out on.
But don't worry, you'll figure it out quick, and this will be super easy for you.
Like I said, just play around with the time on the heat and wait until your sure the glue is melted completely.
After you get that down, you'll be on a depotting spree! Trust me, you'll want to depot everything!


No comments:
Post a Comment
Comments Make Me Smile and Smiling's My Favorite!