Wednesday, December 19, 2012

What I Wore Wednesday


Welcome back friends!
If you're new here, I started (along with hundreds of other women) WIWW to get myself out of t-shirts and jeans and to put a little more effort into myself.
Linking up with Lindsey at The Pleated Poppy

Color!
That was my goal. 
I think I succeeded, but next week I will do better :)


Top: Yard sale (Target) for $1
tank: hand me down
jeans: goodwill (loft) $5
shoes: goodwill (old navy) $5

earrings: made by me
necklace: allora handmade


It was cold!!
Sweater: H&M
leggings: old navy
boots: rampage


Sunday was our annual christmas cookie exchange (pics soon!)
and I was so busy hosting that I forgot to get a picture of my outfit!
Luckily, I found this one with the lovely Martha! (check out her blog, it is awesome!)
Shirt: yard sale (loft) $1
tank: franchescas
Jeans: goodwill (loft) $6
wedges: thrift store $7
necklace: allora handmade

Doesn't Martha rock those red jeans?!?!

That's it for this week!
Enjoy your wednesday, friends!

Tuesday, December 18, 2012

Christmas House Tour Part Three: Front Entry


Today, I am showing you our front door area!
We actually don't use this door as often as our back, because our back door leads to the main street and where we park our cars. 
But the front door couldn't be left out of this Christmas...

So, here is an overview of the space:
Sorry about the awful picture.
It was so difficult to photograph the entire space because the hallway is so narrow.
But, I think you get the idea.

The wreath is from hobby lobby.

The mat is from target. Recently, I've been loving turquoise and red together.
So, you can probably guess why I love this rug.
(Plus, I love birds!)
and it ties in with the cranberry wreath!


This little gnome came from a garage sale for $3.

and his buddy, the snowman, also came from a yard sale, although I don't remember for how much.

and I agree with him.
Let it Snow!
I'm ready.
No, seriously. 


Monday, December 17, 2012

Hints of Christmas (House Tour: Part Two)


First and Foremost, I again want to say that my prayers are with the families who lost sweet little loved ones on Friday. I cannot imagine what they must be going through, and it pains me to think that I am writing about my christmas decor, when Christmas will always be a time of pain for these families and loved ones. 

*******************************************************************
If you remember from Part One, my family really had to scale down Christmas this year.
While I'm sure my mom and brother would've been fine putting up no decorations at all, I had to at least have something. Nothing big, because we certainly have done big before, but just hints. 
So, here are our "hints" of Christmas. 
Okay, I also have to admit that the majority of this "house" tour is actually my bedroom.
Like I said, my mom and brother were being scrooges, so I decorated my room and let them be humbugs.


Here is an overview of my bed!
I added lights and lots of Christmas pillows.

Both the white tree pillow and the striped tree one (down below) came from goodwill.


This one is my favorite!

This darling lamb came from a craft show. 

She is made up of little scraps of christmas fabric. It is just adorable.

Moving to above my bed...
The mirror was a curbside find and the garland came from a yard sale for $1


Next, is my bedside table.
The tree came from goodwill for 50 cents and the cute little snowman was my grandmothers (Thanks Nana!)


Even my mannequin got some winter love!
Everything she is wearing came from either a yard sale or goodwill


and next to her is my dresser.
I added this amazing find from goodwill for 50 cents.
I love how the three trees are all different sizes.

and the last thing in my room to get some Christmas love was my bookshelf:


This plaque came from homegoods for less than $5.
(it's my favorite Christmas song!)


and below that I added these cute little guys from Pier one a few years ago.

and I also brought out this book my mom gave me when I was little. 
I love to re-read it every winter.

and now on to our living space!


You've already seen our tree.


but see that little guy peeking on the left?

Here he is up close!
We got him at homegoods a few years ago.

and finally, our back door.
We purchased the candy cane last year on the day after Christmas, at our local Kroger.
They were trying to get rid of it and we scored it for $3!

I'll show you our front door tomorrow (god-willing)
Until then enjoy your monday!

Sunday, December 16, 2012


                                   Source: gatherlove.tumblr.com via Amber on Pinterest


Tonight, as my eyes are filled with tears, I am praying for those families who lost their sweet souls in such a horrific tragedy.  


Friday, December 14, 2012

DIY Anthro-Inspired Mason Jar Snow Globes

So, I'm sure you've probably seen these fabulous mason jars at Anthropologie and on blogland recently.

                                                   Source: anthropologie.com via Amber on Pinterest

See, Adorable... Right?
I love them. Possibly because I have a slight obsession to mason jars and the fact that we already know how much I adore Christmas. 
So, obviously, I had to get me some. 
Only thing is that I wasn't going to pay $30 per jar!

Needless to say, I whipped out my glue gun and started craftin'
Which leads me to this tutorial:


Here is what you'll need:


Mason Jars with Lids
Fake Trees (I found a pack of 9 at Joanns 60% off, but they are also sold individually)
Fake snow (Mine was purchased at Joanns, but you could also use epsom salt) 
Glue Gun 
Ribbon (optional)

Step One:

Apply a small amount of glue on backside of the lid.


Step Two:
Add on your tree! 
Pick a size that will fit perfectly in your jar.


Step Three:

Add in your desired amount of snow flurries, 
Place your lid together and tighten. You don't want any snow to fall out!

Flip it over and...


Just like that, you have fantastic, handmade snow globes that only took a few minutes to throw together!

Now, If you're anything like me, you can't just stop there.
 I wanted them to be more "christmas-y", so I took it a step further.
This step is totally optional, but I think it makes them so much more festive:


Measure the length of the lid and find some adorable Christmas ribbon (mine is, once again, from Joann's)


Cut the ribbon with the measured length and hot glue it around its diameter. 

and that's it! 
See! I told you they were easy!


FYI, you can't just make one. 
Seriously.
They are addicting.


Wednesday, December 12, 2012

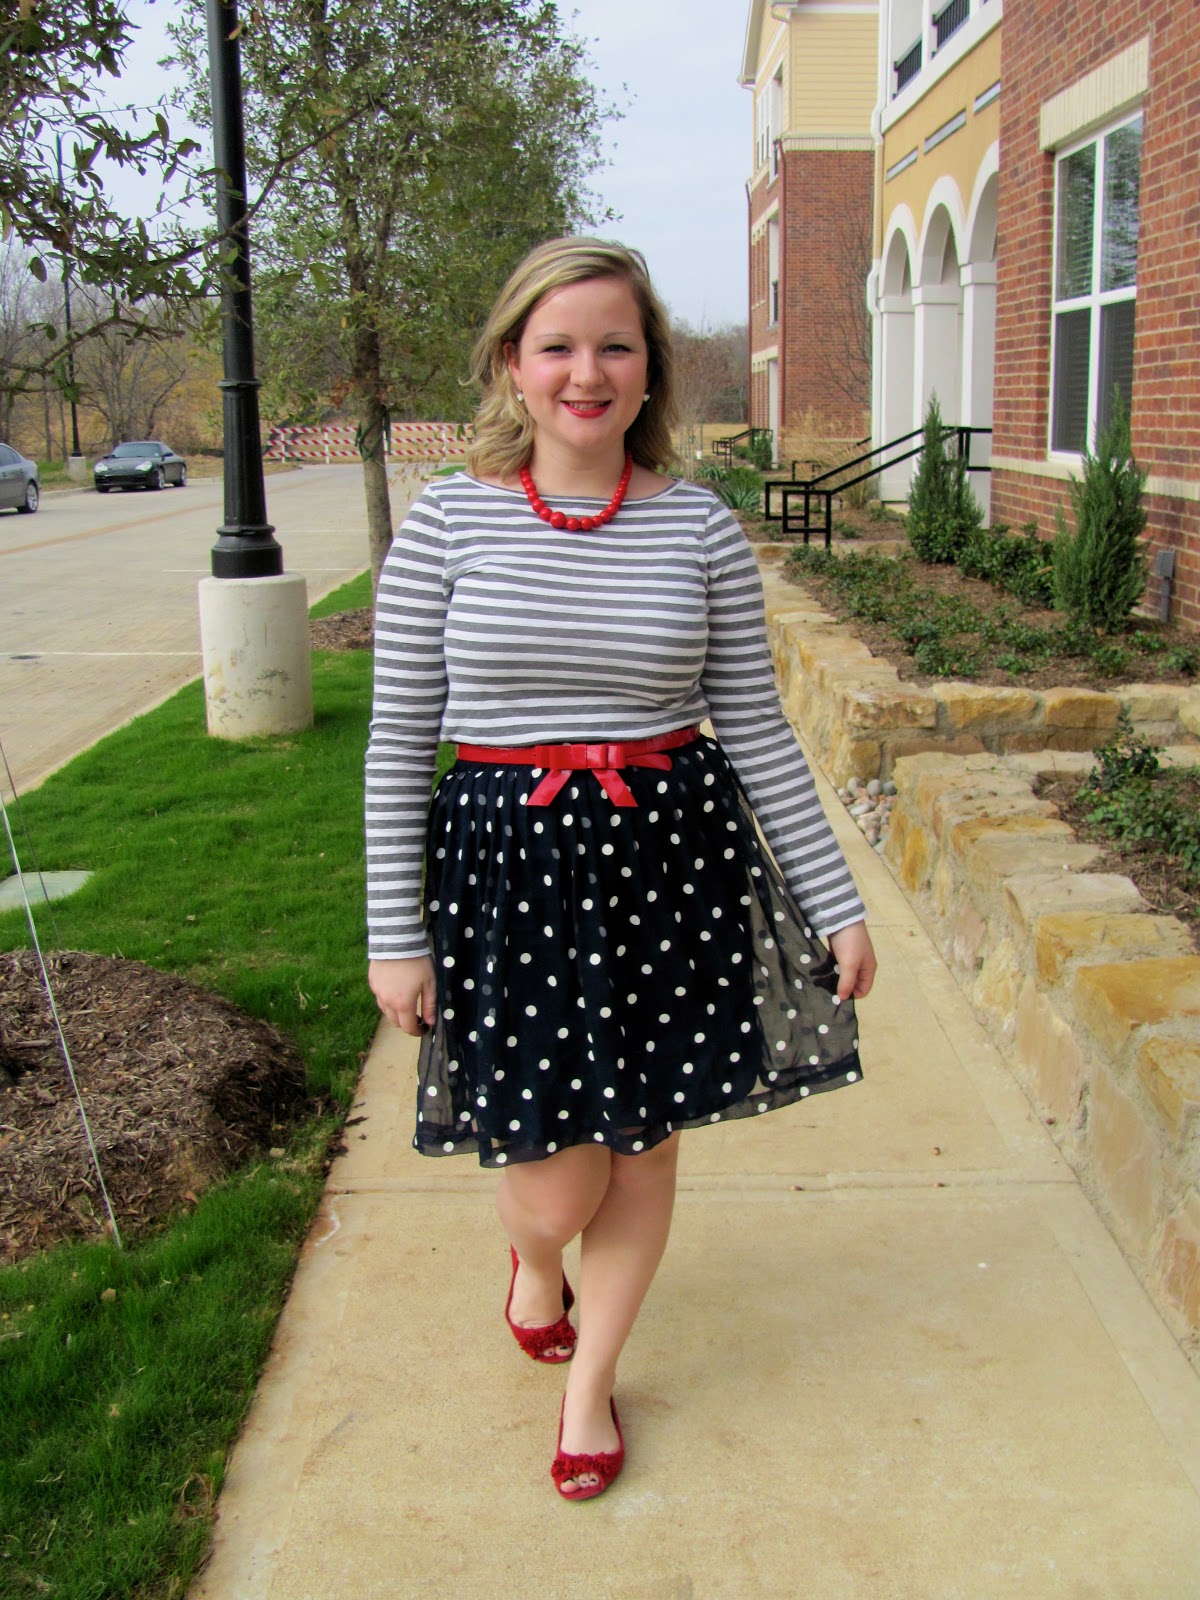
What I wore: Stripes and Dots & 99.9% Thrifted


Last saturday, I was frantically searching for the perfect outfit to wear my first Christmas party of the season. I needed something semi festive, but also not very warm
 It was 70* saturday, and today it's 20*....gotta love Texas!
Of course, you should already know that the first place I look is pinterest.


                                                                                      Source: Uploaded by user via Olsenboye on Pinterest

I saw this picture, and knew I already had all the pieces in my closet. 
Except, I wanted to add pops of red to make it more "christmas-y"

This is what I came up with:


and here is the best part...
it is 99.9% thrifted!
Striped tee (Jcrew) skirt, necklace and belt- goodwill
seriously, I love goodwill.
and the shoes were purchased at macy's for 70% off...
( I'd hardly consider that "retail")
but, Im honest, thus the 99.9%.

So, how did I do?
Have you tried print mixing yet?

pleated poppy